bkgd

Sunday, June 30, 2013

Editorial look # 2

I am so excited to share this video with you, I think it has a lot of good information on how to accomplish a bohemian look. It also teaches you how to do your makeup for pictures. 

Thank you for reading and enjoy!


Makeup by: me
Photos taken by: Pink Paisley Photography
This lady takes awesome pics!!


Friday, May 10, 2013

Brushes you Need and How to use them

Hey friends, I want to show you what brushes you need, why you need them and how to use them

First is the foundation brush

Why you need it: your foundation will go on a lot smoother and will look more like your own skin vs. looking streaky and uneven if applied with finger tips (not to mention that applying foundation without first washing your hands is gross)

How to use it: there are tons of different foundation brushes out there but your main goal is to buff the foundations on your skin to make it look as natural as possible (still covering imperfections but not cakie looking)


Second is eye primer brush

Why you need it: it applies your eye primer evenly and buffs it into the skin instead of plastering the product on your eyelid with your fingertip

How you use it: buff the product onto your eyelids all the way to where your eyebrow starts


Third is a flat rounded eyeshadow brush

Why you need it: this brush is a wonderful tool to help you DEPOSIT more product onto your eyelid. The more product, the more vibrant your eyeshadow will look

How to use it: Rub onto eyeshadow and then onto your eyelid. Simple as that. no need to buff


Fourth brush is a blending brush

Why you need it: this brush will save your life. It allows you to buff in all those pretty colors you just applied on your eyelids. It makes everything come together. There is nothing like it. You NEED it

How to use it: gently buff any harsh edges around your eyelid and blend in darker colors to the outer corner of your eyelids


These are 4 of the most essential brushes that you need to own. Hope this post was helpful to your makeup routine.

Wondering what you want for mothers day, or your birthday or the holidays? This is what you want!

Disclaimer: I don't get paid to write this. This is my real life experience as a professional makeup artist.


Saturday, March 30, 2013

I am back

Hello again my friends, No, I'm not dead. Just decided to take a little time off to focus on work and family. March has been a busy month for me. From wedding makeup to editorial work to a little baby boy teething. This month has been so rewarding.

Here is a little tutorial on how to do makeup for a photoshoot or editorial work. This will help you know how to do makeup so that it looks vibrant and beautiful on paper.

Well, enjoy and let me know if you have any questions.


My very talented friend took these pictures 
You can see more of her work here


Monday, February 11, 2013

How to apply blue eyeshadow

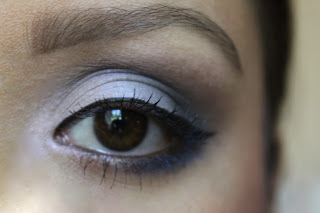
This week I decided to do a blue eyeshadow challenge because I know most of you (us) do not wear our blue eyeshadows nearly enough. This video will teach you some cool tips and tricks on how to apply blues and to not be afraid of them. 
I hope you challenge yourself this week and wear blues for a change :) 


Makeup I used:
Primer: painterly
Brows: spiked
Skin: prerp n prime and studio fix fluid
eyes:
highlighter: crystal
lid: winkle
outer corner: deep truth
crease: concrete
pencil: coffee
eyeliner: penultimate
blush: well dressed
Lips: blankety lipstick with ample pink


Saturday, February 2, 2013

Makeup look for darker skin tones

This is one of my favorite looks for women with dark skin. I love how golds and peachy tones look on them so I thought I would share my tips and tricks on accomplishing this look. 

products I used
Prep and prime skin (to smooth out pores)
studio fix fluid foundation in NC 35
Painterly eyeshadow primer
highlight: crystal
eyelid brown: woodwinked
eyelid orange: orange
crease brown: charcoal brown
blush: ambering rose 
lips: limited edition, brown with gold sparkles 

Saturday, January 26, 2013

Products you need in your life...

K so i am not doing a video tutorial today because I want to talk about a couple of products you need to own and the reasons why you need to own them.

1. 2 brushes... MAC's 239 and 224
they are about $20 and $30 respectively but you can find the first one at michaels for $3. The 224 brush you just have to purchase from MAC full price.

239
224


The reason you need this super expensive blending brush is because your makeup will never look as good without using this brush. Put it on your birthday present list because you need it. The other good thing about this brush is that it should last you YEARS (I've had mine for over 8 years). Its is something that you don't need to replace constantly. Its is a one time investment (unless you lose it of course).

2. Fix plus from MAC. Its about $20 and you can make it last for up to 2 years. I use it before I apply my makeup to moisturize, during my makeup application (if my foundation feels too dry, I mix it with some fix plus to moisten it) and as a finishing spray to hold your makeup on your face.

There are some tutorials out there on how to make it for cheap in case you're into diy-ing.

3. eyeshadow primer in painterly. Its also about $20 and same as fix plus, you can make it last up to 2 years. You put it on your eyelids up to your eyebrows before you start your eyeshadow so your eyeshadow has something to stick to. You need this, period and I don't know of anything better or cheaper than this.


Other than these three (4) things, you dont need to spend a lot of money in your makeup and specially if you feel like you already have a good collection youre set.

So... if you dont feel like going to the mall, Nordstrom has free shipping on anything, even if you only buy one of these items at a time, its FREE shipping on anything all the time... love it!
Good luck ladies!! 

Saturday, January 19, 2013

How to pencil in your eyebrows

Its makeup time again. I am the brow queen and LOVE to pencil in eyebrows. I feel like eyebrows can help make your face more symmetrical and it just completes your makeup look. 
I hope you enjoy this video and I challenge you to try and fill in your brows with whatever you have at home (a neutral greyish brown eyeshadow or a pencil) and see how you like it. 
PS. This is the first tutorial I ever made so I kinda sound like a robot right at the beginning. 

Saturday, January 12, 2013

Its time for a pop


Its been so gloomy these past couple of days that 
I just needed a little color in my life. 
This tutorial will teach you how to incorporate ANY 
bright color into your daily routine of browns. 

Next time you get stuck doing the same eyeshadow as always, 
remember to just grab a fun color and pop it in the middle of your eyelid. 
I hope this tutorial helps you be more daring with your makeup.


Product I used: 
Eye primer: Painterly
inner corner: blanc type
bright orange: orange
brown: handwritten
blush: peachtwist
Lipstick: girl about town
gloss: limited edition


Friday, January 4, 2013

MAC SPRING 2013 LOOK

I know its winter but I coudnt help it but make this tutorial probably because I just want it to be warm again (not that this 60 degree weather isnt warm to some of you). 
I chose this look from the MAC facebook page and I am excited to share this with you and hope you try it some time in the next few months. 


Makeup I used:
foundation: MAC mineralized satin liquid (discontinued) 
brows: clear wax, spiked liner, clear gel
eyeliner: penultimate
mascara: haute and naughty
lips: primer, pink pencil, lustering lipstick